17,005 Documents in our Technical Library
2727851 Total Downloads

Newest Additions

NASA-RP-1060 Subsonic Aircraft: Evolution and the Matching of Size to Performance
AA-CP-20212-001
AA-CP-20212-001
ADPO10769 Occurrence of Corrosion in Airframes
The purpose of this lecture is to provide an overview ...
MIL-STD-1759 Rivets and Rivet Type Fasteners Preferred for Design
The purpose of this book form standard is to provide ...
MIL-STD-810G Environmental Engineering Considerations and Laboratory Tests
This standard contains materiel acquisition program planning and engineering direction ...

naca-tn-955

  • Version
  • 160 Downloads
  • 862.39 KB File Size
  • 1 File Count
  • December 1, 2016 Create Date
  • December 1, 2016 Last Updated
Scroll for Details

National Advisory Committee for Aeronautics, Technical Notes - Axial Fatigue Tests at Zero Mean Stress of 24S-T Aluminum Alloy Sheet With and Without a Circular Hole
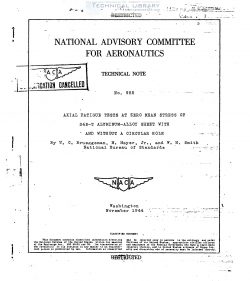
naca-tn-955-axial-fatigue-tests-at-zero-mean-stress-of-24s-t-aluminum-alloy-sheet-with-and-without-a-circular-hole-1

Axial fatigue tests were made on 189 coupOn specimens
oan.O3B-inch 245~T aluminum-alloy sheet and a few supple—
mentary specimens of 0.064—inch sheet. The mean load Was
zero. The specimens were restrained against lateral buck-
ling by lubricated solid guides described in a previous reé'_
port on this project. About two-thirds of the 0.032—inch
specimens were plain coupons nominally free from stress
raisers. The remainder contained a 0.1285—inch drilled hole
at the center where the reduced section was 0.5 inch wide.
S—N diagrams were obtained for cycles to failure between
abqut 1000 and 107 cycles for the plain specimens and l? and
107 cycles for the drilled specimens. The fatigue stress ‘“‘ '"'=
concentration factor increased from about 1.08 for a stress ”*
amplitude causing failure at 0.25 cycles (static) to a max—
imum of 1.83 at 15.000 cycles and then decreased gradually.

The graph for the drilled specimens showed less scatter than
that for the plain specimens.

In spite of the importance of aluminum—alloy sheet in
aircraft, there is a noticeable lack of information in the
literature regarding its fatigue properties. .For instance, ' ‘
the early part of the 3-H curve between 0.25 and 105 cycles
has received little attention; the effect on the fatigue
strength of stress raisers such as holes has not been thor-
oughly investigated; more information is needed on the
fatigue properties at different mean stresses and On the
cumulative effect of different stress amplitudes.

Mast of the tests which have been made on sheet metals
have been of the flexural type; that is,a bending moment Was
applied to the specimen and the maximum fiber stress was
calculated by the simple beam theory. In service, sheet
metals are nearly always loaded under direct stresses: hence
it is necessary to evaluate the flexural- test results in
terms of direct or axial stresses. InvestigatiOn on steel
and aluminum~alldy bar stock has shown (reference 1) that
usually lower fatigue stresses for failure at a given number
of cycles are obtained from direct axial loading than from
flexural fatigue tests on rotating beams and on fixed beams.
The use of flexural fatigue data for describing the fatigue
strength under direct stress is particularly questionable in
the case of alclad aluminum alloys because of the yielding
of the aluminum coating under relatively small extreme fiber
stresses.

FileAction
naca-tn-955 Axial Fatigue Tests at Zero Mean Stress of 24S-T Aluminum Alloy Sheet With and Without a Circular Hole.pdfDownload 

Comment On This Post

Your email address will not be published. Required fields are marked *

naca-tn-955

  • Version
  • 160 Downloads
  • 862.39 KB File Size
  • 1 File Count
  • December 1, 2016 Create Date
  • December 1, 2016 Last Updated
Scroll for Details

National Advisory Committee for Aeronautics, Technical Notes - Axial Fatigue Tests at Zero Mean Stress of 24S-T Aluminum Alloy Sheet With and Without a Circular Hole

naca-tn-955-axial-fatigue-tests-at-zero-mean-stress-of-24s-t-aluminum-alloy-sheet-with-and-without-a-circular-hole-1

Axial fatigue tests were made on 189 coupOn specimens
oan.O3B-inch 245~T aluminum-alloy sheet and a few supple—
mentary specimens of 0.064—inch sheet. The mean load Was
zero. The specimens were restrained against lateral buck-
ling by lubricated solid guides described in a previous reé'_
port on this project. About two-thirds of the 0.032—inch
specimens were plain coupons nominally free from stress
raisers. The remainder contained a 0.1285—inch drilled hole
at the center where the reduced section was 0.5 inch wide.
S—N diagrams were obtained for cycles to failure between
abqut 1000 and 107 cycles for the plain specimens and l? and
107 cycles for the drilled specimens. The fatigue stress ‘“‘ '"'=
concentration factor increased from about 1.08 for a stress ”*
amplitude causing failure at 0.25 cycles (static) to a max—
imum of 1.83 at 15.000 cycles and then decreased gradually.

The graph for the drilled specimens showed less scatter than
that for the plain specimens.

In spite of the importance of aluminum—alloy sheet in
aircraft, there is a noticeable lack of information in the
literature regarding its fatigue properties. .For instance, ' ‘
the early part of the 3-H curve between 0.25 and 105 cycles
has received little attention; the effect on the fatigue
strength of stress raisers such as holes has not been thor-
oughly investigated; more information is needed on the
fatigue properties at different mean stresses and On the
cumulative effect of different stress amplitudes.

Mast of the tests which have been made on sheet metals
have been of the flexural type; that is,a bending moment Was
applied to the specimen and the maximum fiber stress was
calculated by the simple beam theory. In service, sheet
metals are nearly always loaded under direct stresses: hence
it is necessary to evaluate the flexural- test results in
terms of direct or axial stresses. InvestigatiOn on steel
and aluminum~alldy bar stock has shown (reference 1) that
usually lower fatigue stresses for failure at a given number
of cycles are obtained from direct axial loading than from
flexural fatigue tests on rotating beams and on fixed beams.
The use of flexural fatigue data for describing the fatigue
strength under direct stress is particularly questionable in
the case of alclad aluminum alloys because of the yielding
of the aluminum coating under relatively small extreme fiber
stresses.

FileAction
naca-tn-955 Axial Fatigue Tests at Zero Mean Stress of 24S-T Aluminum Alloy Sheet With and Without a Circular Hole.pdfDownload 
17,005 Documents in our Technical Library
2727851 Total Downloads

Search The Technical Library

Newest Additions

NASA-RP-1060 Subsonic Aircraft: Evolution and the Matching of Size to Performance
AA-CP-20212-001
AA-CP-20212-001
ADPO10769 Occurrence of Corrosion in Airframes
The purpose of this lecture is to provide an overview ...
MIL-STD-1759 Rivets and Rivet Type Fasteners Preferred for Design
The purpose of this book form standard is to provide ...
MIL-STD-810G Environmental Engineering Considerations and Laboratory Tests
This standard contains materiel acquisition program planning and engineering direction ...