17,005 Documents in our Technical Library
2727358 Total Downloads

Newest Additions

NASA-RP-1060 Subsonic Aircraft: Evolution and the Matching of Size to Performance
AA-CP-20212-001
AA-CP-20212-001
ADPO10769 Occurrence of Corrosion in Airframes
The purpose of this lecture is to provide an overview ...
MIL-STD-1759 Rivets and Rivet Type Fasteners Preferred for Design
The purpose of this book form standard is to provide ...
MIL-STD-810G Environmental Engineering Considerations and Laboratory Tests
This standard contains materiel acquisition program planning and engineering direction ...

naca-tn-971

  • Version
  • 116 Downloads
  • 601.45 KB File Size
  • 1 File Count
  • December 1, 2016 Create Date
  • December 1, 2016 Last Updated
Scroll for Details

National Advisory Committee for Aeronautics, Technical Notes - Fatigue Tests on 1-8'' Aluminum Alloy Rivets
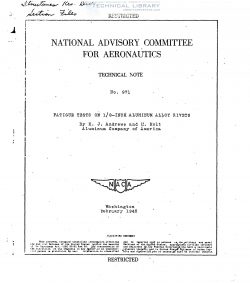
naca-tn-971-fatigue-tests-on-1-8-aluminum-alloy-rivets-1

For a number of years the Aluminum Company of America
has been investigating in the Aluminum_Research(LabOratories
the fatigue characteristics Of riveted joints in aluminum
alloy sheet. Because of the general interest of aircraft
manufacturers in these tests, the NACA published some of
the results. Reference 1 presents fatigue data from tests
of 178— T and 535—T specimens with rivets having diameters'
of 1/4 inch or more.

The purPOSe of the present report is to summarize all
the results of fatigue tests that have been made to date
in the Aluminum Research Laboratories of lap Joints having
l/8—inch aluminum alloy rivets. The rivet'materials used
were l7S—T, Al?S~T, and 24S~T aluminum alloys, while the
plate materials were 248-T and alclad ass-r.

All the joints tested were lap Joints in 24S-T or
alclad 243—T aluminum alloy sheet,_;L;uufiLJdde—and con— .
taining one l7S—T, A17S—T, or 24S—T rivet per Joint. The
total lap in each case was 1/2 inch, giving an edge dis—
tance in the direction of stressing equal to 1/4 inch or
two times the nominal rivet diameter. Table I gives a dee>
scriptive list of the test specimens. All tests were
made in a rotating—beam—type machin e giving a complete
reversal of load tending to shear the rivets.

Figures 1 and 2 show photographs. of the fatigue test—
ing machines used. The machine shown in figure 1 was
designed and built at the Aluminum Research Laboratories
in 1930 and is described in reference 2. This machine
was intended originally for testing rotating beam speci—
.mens having a maximum diameter of 2 inches, but it has
been provided Withr special-— —-fixtures (shown in fig. 3) for
testing Joints. The machines shown in figure 2 were de—
signed and built at the Aluminum Research Laboratories in
1942 and .are specifically int.ended- for use in tests of
Joints‘ using the fixtures shown in figure 4.

FileAction
naca-tn-971 Fatigue Tests on 1-8'' Aluminum Alloy Rivets.pdfDownload 

Comment On This Post

Your email address will not be published. Required fields are marked *

naca-tn-971

  • Version
  • 116 Downloads
  • 601.45 KB File Size
  • 1 File Count
  • December 1, 2016 Create Date
  • December 1, 2016 Last Updated
Scroll for Details

National Advisory Committee for Aeronautics, Technical Notes - Fatigue Tests on 1-8'' Aluminum Alloy Rivets

naca-tn-971-fatigue-tests-on-1-8-aluminum-alloy-rivets-1

For a number of years the Aluminum Company of America
has been investigating in the Aluminum_Research(LabOratories
the fatigue characteristics Of riveted joints in aluminum
alloy sheet. Because of the general interest of aircraft
manufacturers in these tests, the NACA published some of
the results. Reference 1 presents fatigue data from tests
of 178— T and 535—T specimens with rivets having diameters'
of 1/4 inch or more.

The purPOSe of the present report is to summarize all
the results of fatigue tests that have been made to date
in the Aluminum Research Laboratories of lap Joints having
l/8—inch aluminum alloy rivets. The rivet'materials used
were l7S—T, Al?S~T, and 24S~T aluminum alloys, while the
plate materials were 248-T and alclad ass-r.

All the joints tested were lap Joints in 24S-T or
alclad 243—T aluminum alloy sheet,_;L;uufiLJdde—and con— .
taining one l7S—T, A17S—T, or 24S—T rivet per Joint. The
total lap in each case was 1/2 inch, giving an edge dis—
tance in the direction of stressing equal to 1/4 inch or
two times the nominal rivet diameter. Table I gives a dee>
scriptive list of the test specimens. All tests were
made in a rotating—beam—type machin e giving a complete
reversal of load tending to shear the rivets.

Figures 1 and 2 show photographs. of the fatigue test—
ing machines used. The machine shown in figure 1 was
designed and built at the Aluminum Research Laboratories
in 1930 and is described in reference 2. This machine
was intended originally for testing rotating beam speci—
.mens having a maximum diameter of 2 inches, but it has
been provided Withr special-— —-fixtures (shown in fig. 3) for
testing Joints. The machines shown in figure 2 were de—
signed and built at the Aluminum Research Laboratories in
1942 and .are specifically int.ended- for use in tests of
Joints‘ using the fixtures shown in figure 4.

FileAction
naca-tn-971 Fatigue Tests on 1-8'' Aluminum Alloy Rivets.pdfDownload 
17,005 Documents in our Technical Library
2727358 Total Downloads

Search The Technical Library

Newest Additions

NASA-RP-1060 Subsonic Aircraft: Evolution and the Matching of Size to Performance
AA-CP-20212-001
AA-CP-20212-001
ADPO10769 Occurrence of Corrosion in Airframes
The purpose of this lecture is to provide an overview ...
MIL-STD-1759 Rivets and Rivet Type Fasteners Preferred for Design
The purpose of this book form standard is to provide ...
MIL-STD-810G Environmental Engineering Considerations and Laboratory Tests
This standard contains materiel acquisition program planning and engineering direction ...