17,005 Documents in our Technical Library
2727378 Total Downloads

Newest Additions

NASA-RP-1060 Subsonic Aircraft: Evolution and the Matching of Size to Performance
AA-CP-20212-001
AA-CP-20212-001
ADPO10769 Occurrence of Corrosion in Airframes
The purpose of this lecture is to provide an overview ...
MIL-STD-1759 Rivets and Rivet Type Fasteners Preferred for Design
The purpose of this book form standard is to provide ...
MIL-STD-810G Environmental Engineering Considerations and Laboratory Tests
This standard contains materiel acquisition program planning and engineering direction ...

naca-wr-l-500

  • Version
  • 123 Downloads
  • 454.76 KB File Size
  • 1 File Count
  • April 2, 2017 Create Date
  • April 2, 2017 Last Updated
Scroll for Details

Tests of 10'' 24S-T Aluminum Alloy Shear Panels with 1.5 Inch Holes
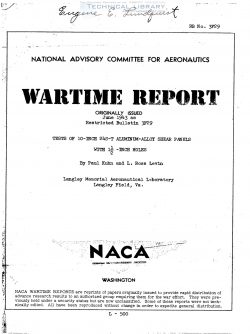
By Paul Kuhn and L; Ross Levin
SUMMARY

Tests were made of a number of 10-inch shear panels
of 24S-T aluminum alloy with ltfi—inch holes to determine
the stress concentration at static rupture and the de-
formation characteristics. The average factor of stress
concentration was found to be about 1.1; reinforcements
around the edges of the holes did not increase the ulti-
mate strengths. Permanent set began in specimens with—
out holes at nominal shear stresses of 10 to 12 kips per
square inch. In thin specimens with holes, permanent
set began at the buckling stress.

INTRODUCTION

In connectiOn with a previous investigation of the
strength of shear webs, some tests had been made of 24S-T
aluminum-allOy tension specimens 1 inch wide with afie-
inch holes (reference 1). These tests indicated a stress—
cOncentratiOn factor of about 1.08 for static rupture.
The question arcse as to whether this factor could be ap—
plied to somewhat larger holes, such as these used to
permit the passage of conduits. tubing, or controls
thrOugh a shear web, and as to how much the stress con-
centration could be reduced by reinforcing the edges of
the holes. The results of a series of tests undertaken
to answer these questions are presented herewith. In the

-course of the tests, information was also obtained on the

depth of the shear buckles both under lead and after re-
moval of load.
SYMBOLS
a side of shear frame, inches
d diameter of rivet hole, inches
D diameter of hole. inches
E Young's modulus of elasticity, kips per square inch
P ultimate load. kips
t sheet thickness. inches
0 normal stress. kips per square inch
OY-P. normal stress at yield point, kips per square inch
T nominal shear stress. kips per square inch
Tor critical shear stress. kips per square inch

FileAction
naca-wr-l-500 Tests of 10'' 24S-T Aluminum Alloy Shear Panels with 1.5 Inch Holes.pdfDownload 

Comment On This Post

Your email address will not be published. Required fields are marked *

naca-wr-l-500

  • Version
  • 123 Downloads
  • 454.76 KB File Size
  • 1 File Count
  • April 2, 2017 Create Date
  • April 2, 2017 Last Updated
Scroll for Details

Tests of 10'' 24S-T Aluminum Alloy Shear Panels with 1.5 Inch Holes

By Paul Kuhn and L; Ross Levin
SUMMARY

Tests were made of a number of 10-inch shear panels
of 24S-T aluminum alloy with ltfi—inch holes to determine
the stress concentration at static rupture and the de-
formation characteristics. The average factor of stress
concentration was found to be about 1.1; reinforcements
around the edges of the holes did not increase the ulti-
mate strengths. Permanent set began in specimens with—
out holes at nominal shear stresses of 10 to 12 kips per
square inch. In thin specimens with holes, permanent
set began at the buckling stress.

INTRODUCTION

In connectiOn with a previous investigation of the
strength of shear webs, some tests had been made of 24S-T
aluminum-allOy tension specimens 1 inch wide with afie-
inch holes (reference 1). These tests indicated a stress—
cOncentratiOn factor of about 1.08 for static rupture.
The question arcse as to whether this factor could be ap—
plied to somewhat larger holes, such as these used to
permit the passage of conduits. tubing, or controls
thrOugh a shear web, and as to how much the stress con-
centration could be reduced by reinforcing the edges of
the holes. The results of a series of tests undertaken
to answer these questions are presented herewith. In the

-course of the tests, information was also obtained on the

depth of the shear buckles both under lead and after re-
moval of load.
SYMBOLS
a side of shear frame, inches
d diameter of rivet hole, inches
D diameter of hole. inches
E Young's modulus of elasticity, kips per square inch
P ultimate load. kips
t sheet thickness. inches
0 normal stress. kips per square inch
OY-P. normal stress at yield point, kips per square inch
T nominal shear stress. kips per square inch
Tor critical shear stress. kips per square inch

FileAction
naca-wr-l-500 Tests of 10'' 24S-T Aluminum Alloy Shear Panels with 1.5 Inch Holes.pdfDownload 
17,005 Documents in our Technical Library
2727378 Total Downloads

Search The Technical Library

Newest Additions

NASA-RP-1060 Subsonic Aircraft: Evolution and the Matching of Size to Performance
AA-CP-20212-001
AA-CP-20212-001
ADPO10769 Occurrence of Corrosion in Airframes
The purpose of this lecture is to provide an overview ...
MIL-STD-1759 Rivets and Rivet Type Fasteners Preferred for Design
The purpose of this book form standard is to provide ...
MIL-STD-810G Environmental Engineering Considerations and Laboratory Tests
This standard contains materiel acquisition program planning and engineering direction ...